

Wednesday, September 30, 2015
Pieced Border on Amazing Grace Quilt
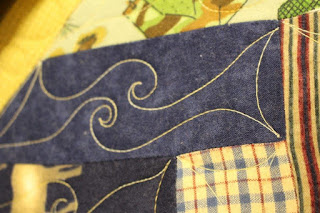
I've finished the pieced border on the Amazing Grace quilt. There are three more borders to do -- a narrow, a wide, and another narrow. But I won't get them done until next week -- because in the morning, we are leaving on a little three-day vacation in the Sandhills.

Saturday, September 26, 2015
Corner Blocks for the Amazing Grace Panel Quilt
Today I paper-pieced the corner blocks for the second border on the Amazing Grace quilt. (See previous post for EQ7 design and photo of center panel.) Or wall hanging. Whatever it decides to be. Opposing corners will be light, and the other two corners will be dark. The first narrow border, dark brown, is sewn on.


Friday, September 25, 2015
Designing Borders for Amazing Grace Panel
This evening I used EQ7 to design the borders for the Amazing Grace panel I purchased June 25:

♫ ♪ Amazing Grace panel ♪ ♫

Amazing Grace coordinates
Here are the borders:

I will paper-piece the corners, rotary-cut the rest. The first inner border is cut. The finished size of the quilt (wall hanging? couch throw?) will be 46.5" x 66.5".
Thursday, September 24, 2015


Wednesday, September 23, 2015
Customer's Flannel French Braid Quilt, Quilted
My customer's quilt is all quilted:


Border and sashing


Tuesday, September 22, 2015
Customer's French Braid Flannel Quilt, Fourth Row
I've made it to the fourth row of my customer's quilt.


Sunday, September 20, 2015
Customer's French Braid Flannel Quilt
This evening, I started quilting a flannel French Braid quilt for a customer. I've loaded it sideways, the better to quilt the rows in one pass and not have to fit the feathers together when I roll the quilt forward.


Just look at that ripply zipper! That happened because I had to wash the leader, and it shrunk a bit. Doesn't affect the quilt, though. Someday I'll redo it. Maybe.

I pinned the top edge of quilt, batting, and backing, as I was afraid there wasn't enough backing fabric to allow for Red Snappers holding the back, and basting the top and batting onto it a few inches down.


Saturday, September 12, 2015


Thursday, September 10, 2015
Iris Appliqué
I have been invited to show my Graceful Garden quilt to a quilting group Monday, September 14, give a tutorial on my appliqué method, and present a trunk show of my quilted items. I decided to draw up a pattern and type instructions for the ladies who will attend. The instructions are done, and here are photos of the appliqué work:


Iris appliqué pattern, drawn from a picture

Iris appliqué pattern, numbered

Iris appliqué traced templates

Iris appliqué traced templates

Back of numbered templates


Freezer-paper templates sorted onto the fabrics

Freezer-paper templates ironed onto fabric

Trimmed pieces

Edges starched and pressed under

Appliqué tools

Sticky bottom of Clover mini iron


Faultless Hot Iron Cleaner works its magic

In between uses, I rest the hot mini iron in a cup, because...

... the stand didn't do its job so swell. After the hot iron sat on it for a couple of hours, the iron heated the metal part of the stand, and the hot metal melted the plastic base. By the time I went to find the source of the burning plastic odor, the little iron was resting flat against the base, and it was a soft, gooey mess.

Background fabric is placed on the pattern... another pattern at the side for reference while placing the pieces.

Watered-down Elmer's glue on seam allowance

Iris appliqué, all glued down
I will do a blanket stitch around all the pieces tomorrow, insert the photos into the tutorial, and print enough for the ladies at the quilting group.
Subscribe to:
Posts (Atom)